For most families that love to travel, the summer of 2020 will go down as a bye year. Like every other aspect of our lives during the pandemic, we had to adapt and get creative. For our family that meant doing something we most likely would never have done— go on an RV trip.
Don’t get me wrong, the IDEA of an RV trip is fabulous but, I know myself and my family. I know Nate doesn’t want to spend hours waiting in lines (we’ve never gone to Disney World) or a third of the vacation driving to and from vacation (no driving to the beach for us). I know Lila gets car sick and Zoë gets hangry. I know my motto is, “It’s not a vacation for me if I’m doing the same things I do at home only with fewer resources.” But, I also knew that if we didn’t get out of our quarantine abode we may end up a family member or two short once the pandemic ended. So, we did it. We rented an RV, loaded our family and dogs into it, and headed out to explore Wisconsin. It was a great family bonding experience and all of us survived. 😉
The Itinerary
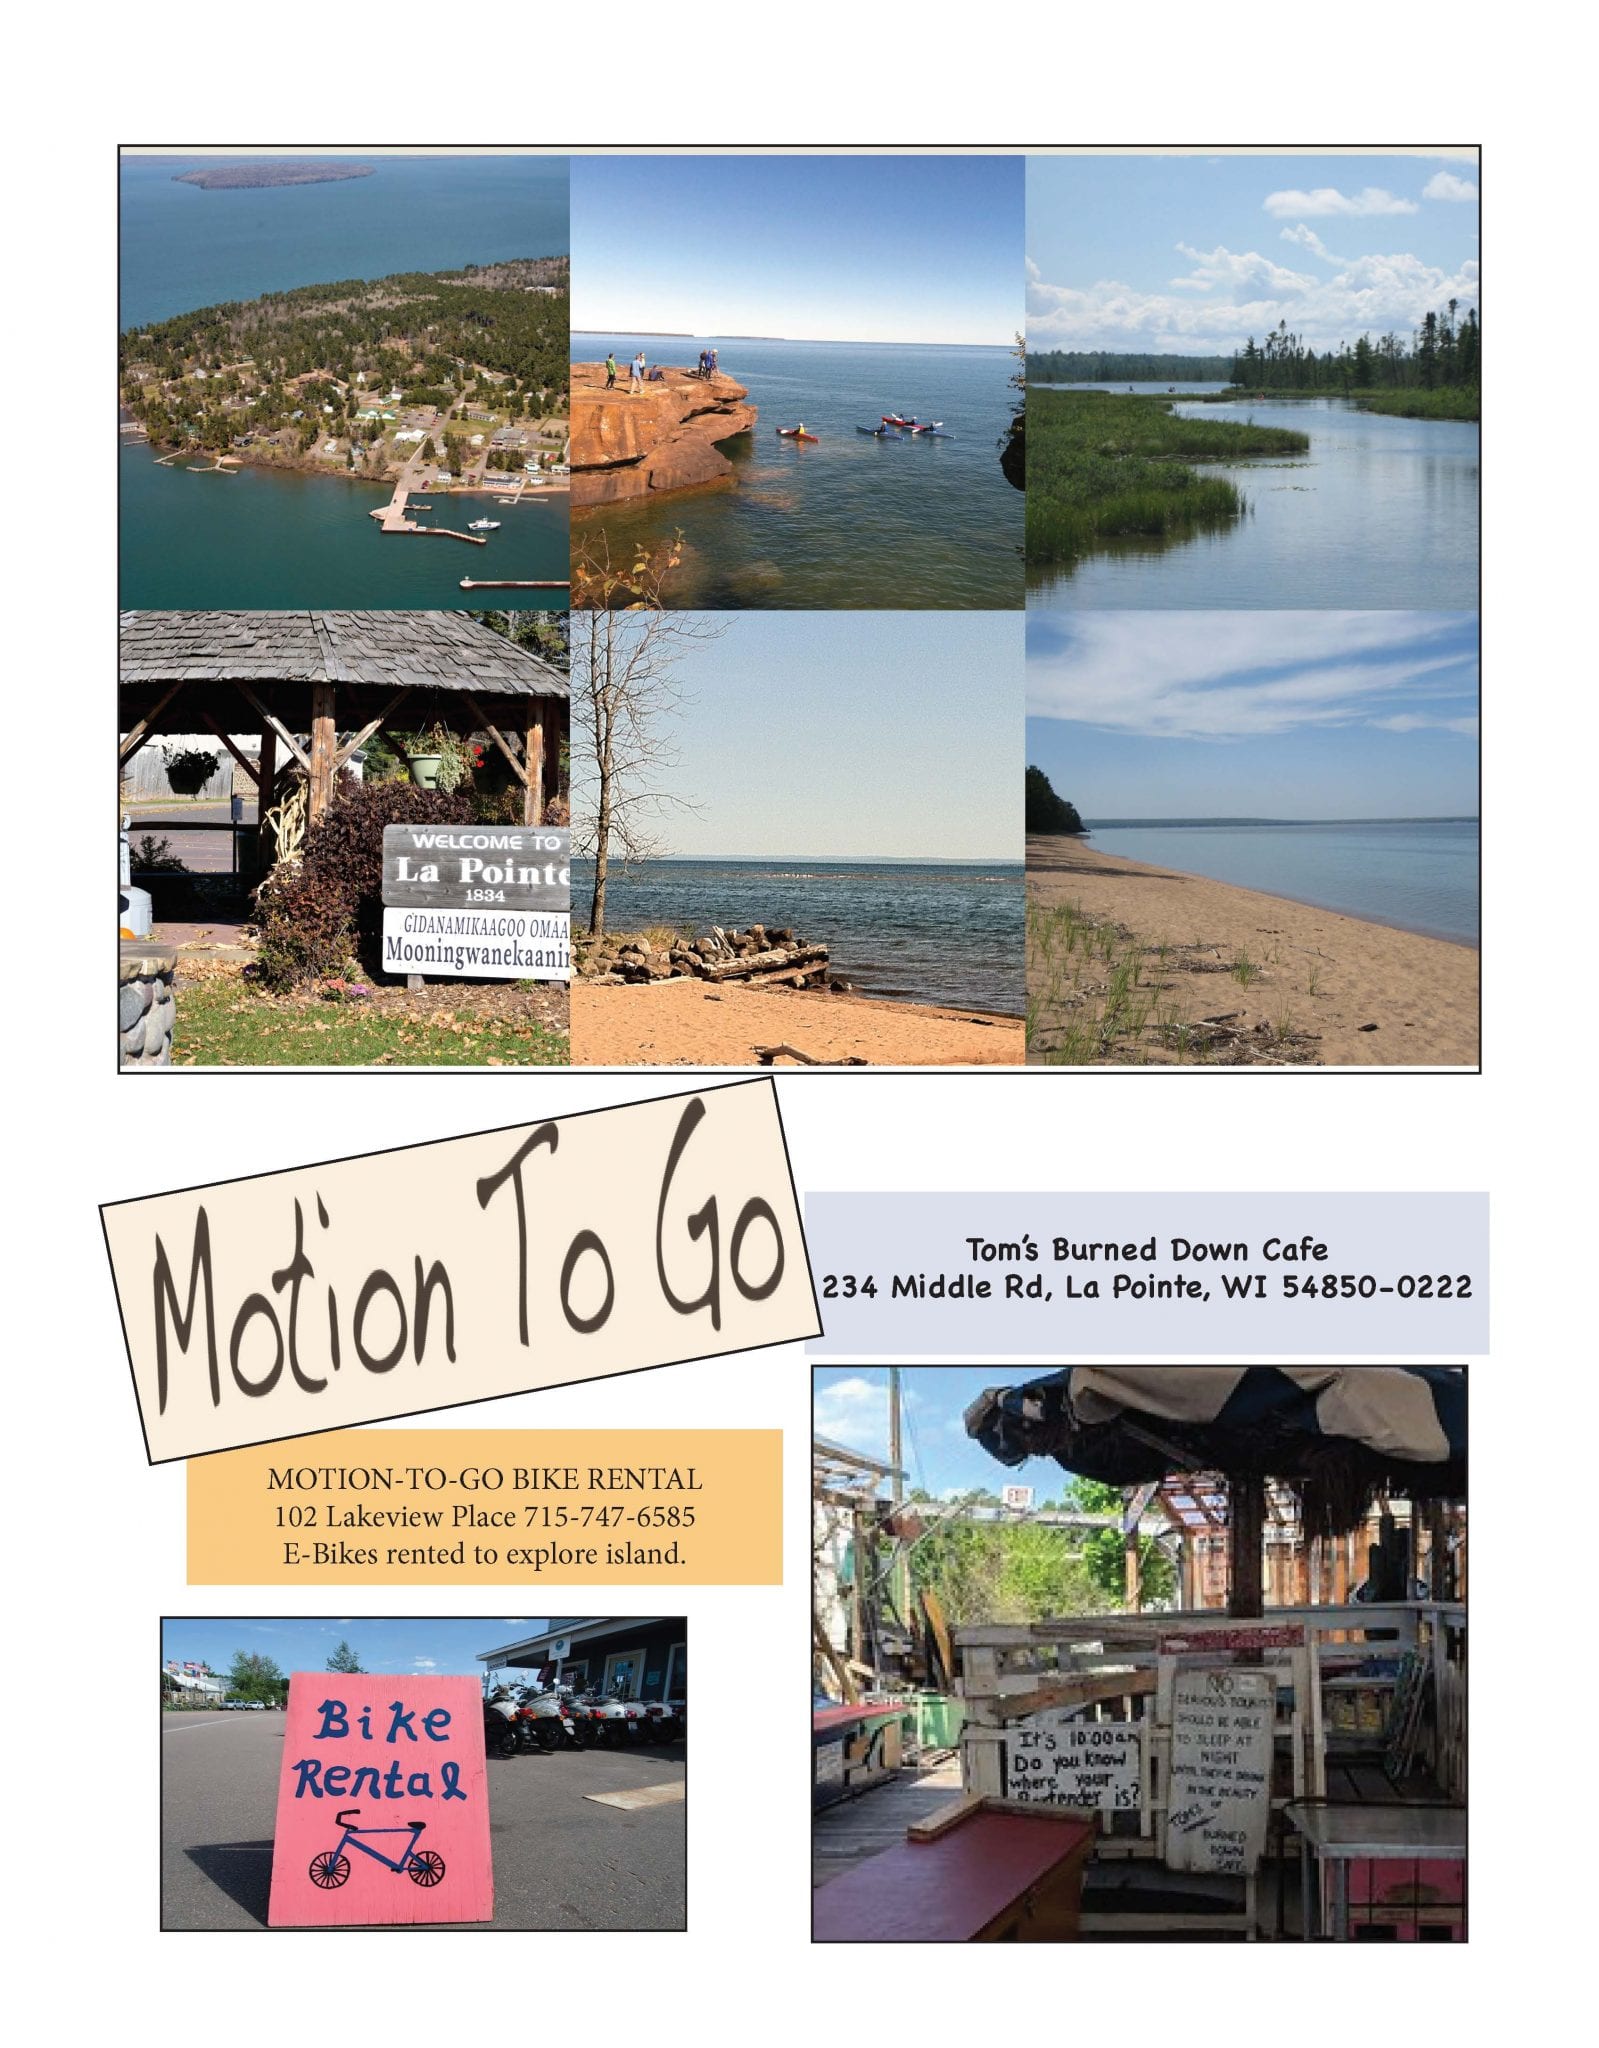
Since we’d probably never make the drive again our number one destination was The Apostle Islands and it was by far the best part of the trip. We created the itinerary around this destination. From there we wanted to come back a different route so we could make stops at unique places (world’s largest ball of twine, anyone?) and visit a few state parks. I’ve included our overall itinerary at the bottom of this page but if you’d like more details let me know!
The RV Selection Process
I had zero knowledge of RVs. If someone told me all about their new Class-A, B, or C camper before last summer I would have just nodded and said it sounded awesome, while my internal monologue thanked the heavens I wasn’t going anywhere in one of them. I looked into A, B, or C class campers trying to decide which would be the best fit. Here’s what you need to know:
Class A- The tour bus-looking motorhome. These are going to give you the creature comforts of a shower, toilet, private bedroom, and full working kitchen. They have slideouts that give you a lot more living space including full-size sleeping above the driver/passenger area and have automatic leveling. This is the 5-star hotel of RVs. You should have some experience driving large vehicles before heading out in one of these.
Class B- The small one that tries to pack a lot in. There’s a “bathroom” but I can’t accept this as an accurate description to serve a family. If you’ve never RVd before and read that an RV has a bathroom I promise you this bathroom is not what you’re thinking. There are no slideouts-what you see is what you get. The fuel efficiency on these is great and you’ll be able to go anywhere your family minivan would go. If you’ve got one small child and don’t need a lot of extra comforts this could work.
Class C- The RV you see with an extension that reaches over the front cab. These are larger than Class B but smaller than Class A and many find are the perfect balance of drivability and creature comforts. Most have a slideout to give more space once you set up camp. There’s a dedicated bunk area in the part of the RV that extends over the cab so there’s less assembly and takedown of the kids’ sleeping area. Class C RVs come in a range of sizes so it really depends on what you’re looking at renting as to whether or not one will be big enough but most can comfortably sleep a family of five or six. I’ve seen some rentals saying they sleep 11 but that’s like saying you could sleep two families in one stateroom on a cruise ship.
Make sure you go and look at the specific RV you’re going to rent. These things take a beating and even the high-end vehicles can be worn out and dingy after a couple of years.
We planned this trip during the peak of RV rentals in the summer of 2020 so there weren’t many RVs available. We ended up finding Lake Country RV Rentals LLC and were lucky to get their Class A motorhome. The owner and his wife are lovely and will even bring the RV to you, give you a tutorial, and are available for help if any questions come up on your trip.
Campground Terminology
There are private campgrounds and those you find in state and national parks.
* The state and national parks have few campsites with electrical/sewer hookups so reserve your spot early. Go ahead and buy your annual pass online once your reserve your RV. It makes entering the parks a lot easier.
* Site lengths tell you the max length of an RV the site can accommodate. State and national parks don’t have a lot of campsites for bigger Class C or Class A RVs.
* Pull Through vs Back In tells you how you’re going to get into the site. If you can find a pull-through go with that site. Campsite roads can be pretty narrow and have overhanging tree branches that make it difficult to turn around.
* If your RV comes with a generator make sure they’re allowed. Many campsites don’t allow generators at all or require they’re turned off by a certain time. Ours came in handy when we blew a fuse at a site and needed to run the AC with generator power.
* Many campsites only have 30 amp hookups so you’ll need a converter if your RV runs on 40 to avoid overloading the electrical system. Ask the rental company if they provide converters for you and extra fuses for the RV’s battery and electrical.
* Private campgrounds will usually have a laundry and shower building. It’s a good point in the trip to wash everything but be prepared to wait for machines to become available.
Meal Prep
* This is pretty important and took up a lot of time before we left. But it was SO worthwhile. Some parks are far away from the likes of our local Sendik’s and unless you’re envisioning PB&J and hot dogs each day you’ll want to prep ahead of time.
* I didn’t want to spend time cooking in the RV so I made a menu for the week. Label everything! No matter how much space your RV has, it’s still smaller than what you’re used to and things get moved around. Pre-measure spices into small food storage containers or plastic bags, marinade any meat in gallon Ziploc bags, and dice, slice, or mix together anything you can ahead of time. I bought disposable tin foil baking trays and used each one to hold a meal’s ingredients, labeled the front of the tray with what meal it was, then stacked the trays in the fridge of the RV. I found a delicious cast iron skillet blueberry cobbler recipe to cook over the fire. I made the topping ahead of time knowing we could use the blueberries we picked at Blue Vista Farm!
Things I Wish I Knew Then
* Go ahead and buy two doormats. You’re going to want one for outside the RV by the steps and another for inside.
* Bring a bucket or basket to put your shoes in by the door. (If you’re mildly OCD, make it a rule to not wear shoes inside the RV)
* Bring a dustbuster with you.
* If your RV doesn’t come equipped with a bike rack, buy one and install it ahead of time. Don’t forget a tire pump.
* If you’ve got one of those collapsable wagons you haul sports gear and beach equipment around bring it with you. We had one campsite that was quite the hike to the laundry area.
* Review shower/toilet etiquette with the kids. 😉
Enjoy your adventure!